
Dreamboat Visits the Doctor
sharing is caring
Facebook
Twitter
Reddit
Pinterest
Dreamboat Visits the Doctor
By Eric Johnson
“Busy” is the most common adjective that boaters use to describe the first twenty miles of the Middle Fork of the Salmon River. From the Boundary Creek boat launch to Indian Creek, the water of the Middle Fork hurries from bend to bend and rock to rock in a continuous fall of forty feet per mile. And while this constant drop makes sweepboats possible, it makes daydreaming on the oars ill-advised.
Once a raft slides down the ramp and hits the water, it’s game on. Eddies are few and far between, down-stream oars are in peril, and sharp rocks come at boaters like a river version of space invaders.
Rafters become keenly, almost viscerally, aware of the bottom of their boats: visible cringing, and audible crying can be witnessed when a raft slides over a hidden or unavoidable rock. Ninety-nine percent of such encounters result in nothing worse than a scuff or a scratch. The bottom of the boat makes a plaintive whine as the snag runs the length of the raft. But the floor holds and the boater let’s out a sigh of relief as they float on. But every friendly rule has a villainous exception.
After-all, rocks can be sharp–very sharp.
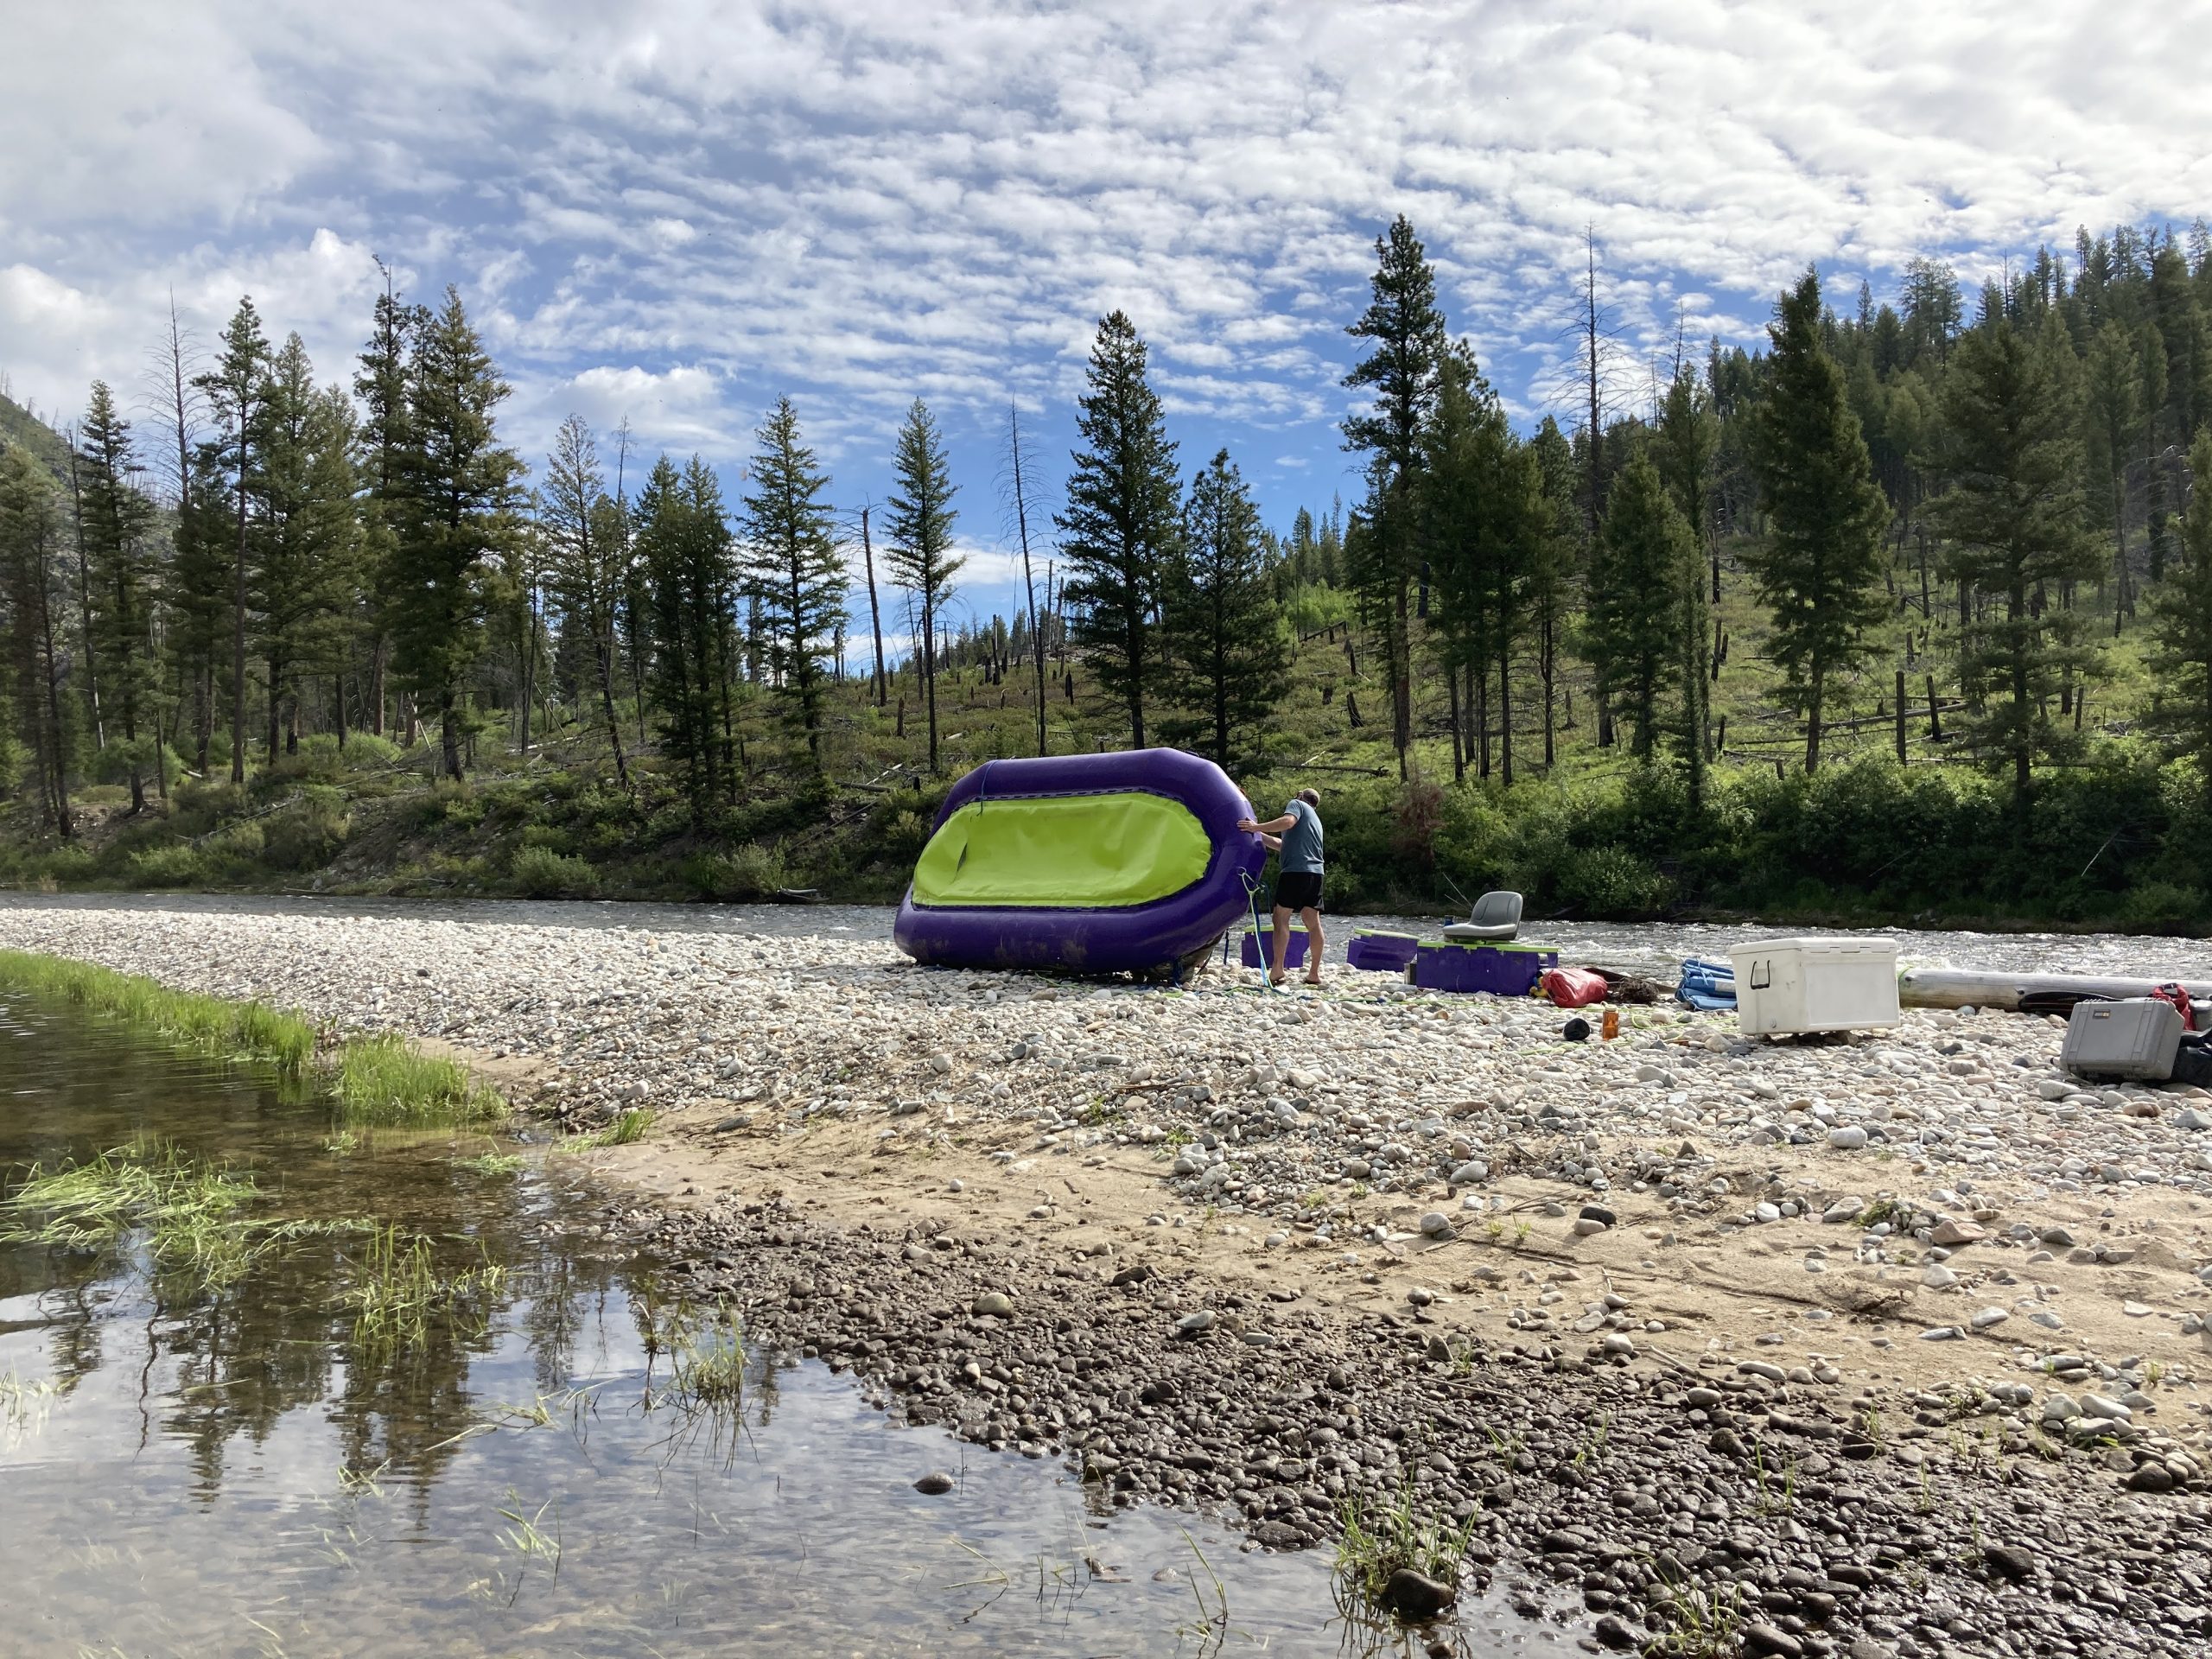
On June 10th of this year, our party launched seven rafts, from the Boundary Creek Boat Launch. On the day of our launch the water level was at what guides call the “ripper” level. Between three and four feet on the Middle Fork Gauge, a minefield of sharp rocks hide just under the surface of the water. Six of our rafts made it to Sheepeater Camp unscathed. One made it to camp quite “scathed.”
Just a few miles from the launch, just past Velvet Falls, Jeff Gillman’s Maravia Dreamboat met a nightmare rock or some sharp man-made debris. (This is currently being debated on Mountain Buzz. Several other boats have suffered the same fate in roughly the same spot.)
“I knew it was bad when I hit it,” Jeff said. “We stopped on the rock, pivoted and I could hear the tearing.”
The floor filled with water and Jeff spent the rest of the afternoon herding a soggy raft through rapids and around rocks.
At camp he pulled in downstream of the rest of the boats on a cobble bar and began derigging a boat that he had just rigged a few hours earlier. When he got the boat unloaded and flipped the raft over, he found a nearly floor-wide tear clean enough to have been cut with a razor. The drop stitching hung from the cut like entrails.
The sun was going down and the air temperature was dropping, so there was nothing for Jeff to do but drink most of his whisky and cry himself to sleep.
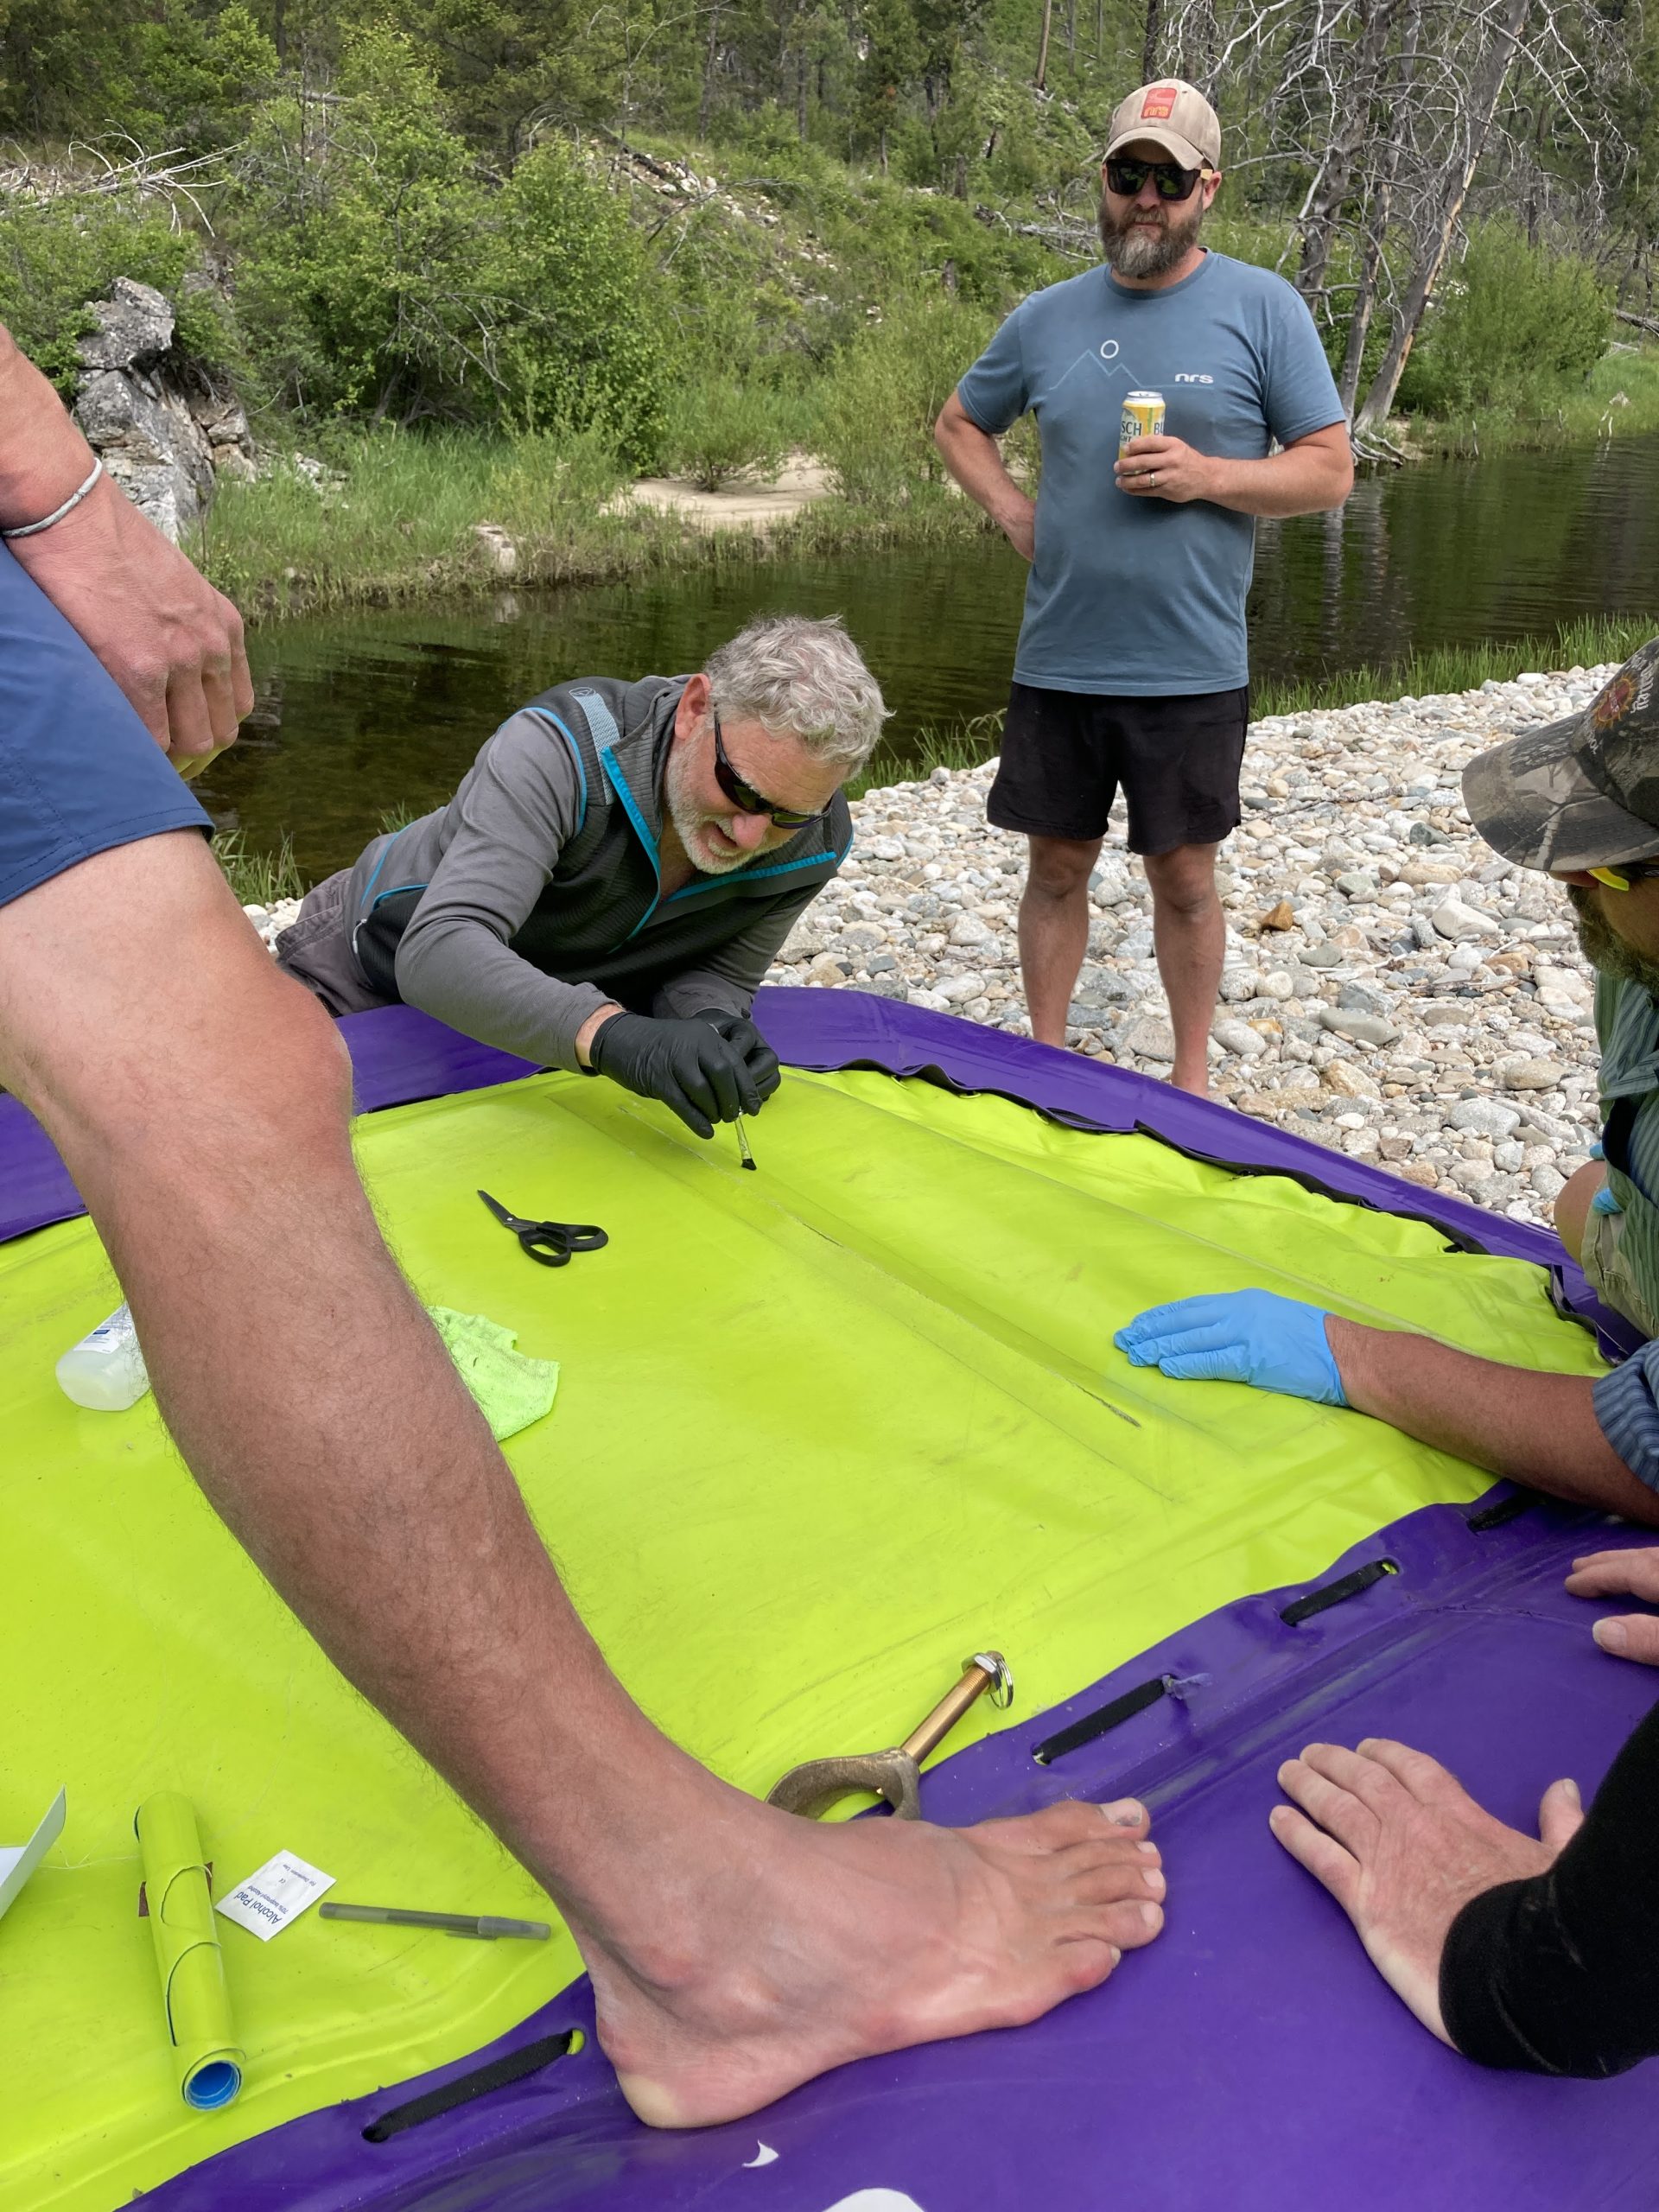
By next morning the rip had not repaired itself, but the sun was out and there were a lot of hands ready to help.
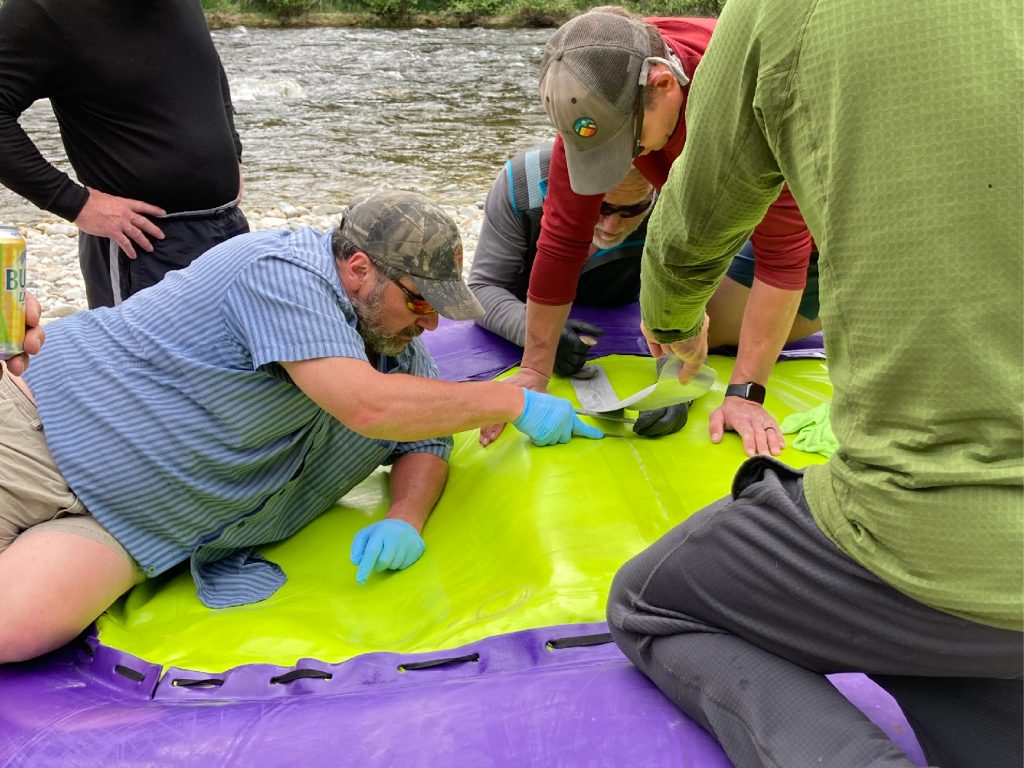
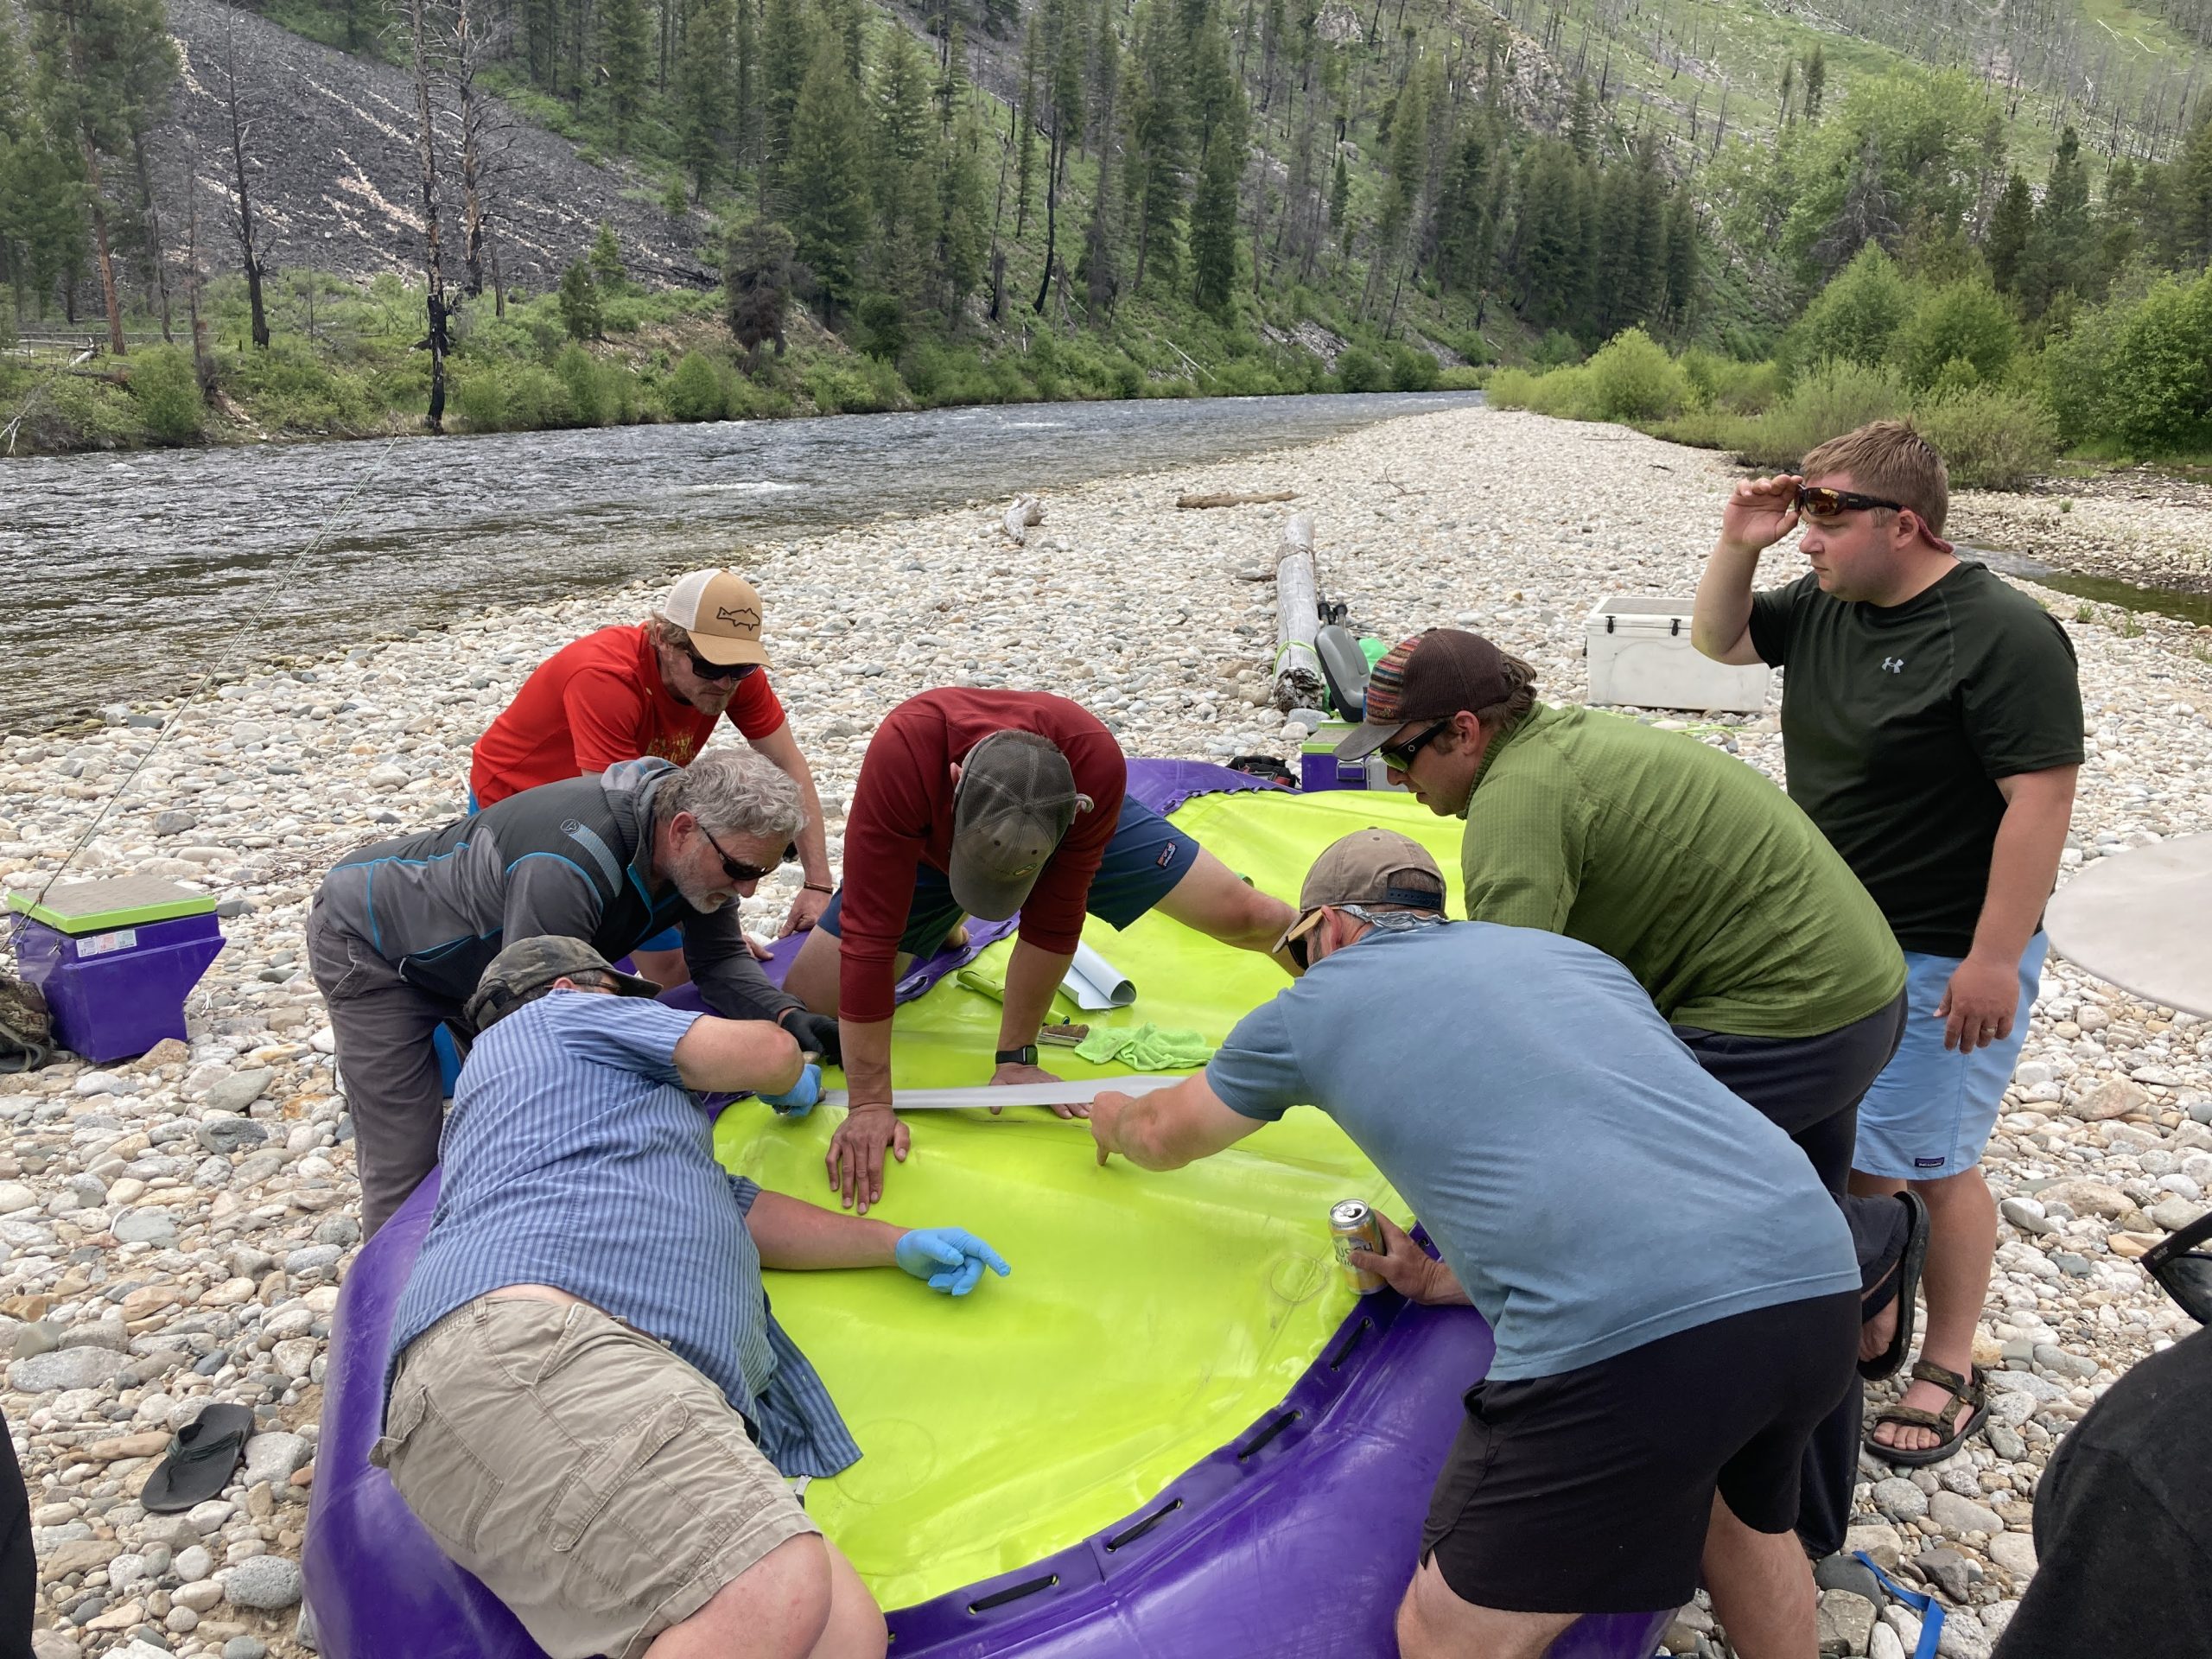
A half dozen of us crowded around the torn raft as if it were a car beside the road with its hood up. The raft repair group consisted of a doctor, a couple of carpenters, a couple of lawyers, a photographer and a teacher. Between us, we offered half a dozen ideas about what to do. But more importantly, between us, we had what amounted to a complete repair kit. As raft materials have improved, repair has become less frequent. Glues and tapes age in ammo boxes and repair skills languish from lack of use. Sometimes, it takes a village.
Someone offered up some sandpaper to rough up the edges of the tear. Someone else had some solvent to clean the surface. Someone contributed some Clifton Adhesive that was not a dried glob of goo. And someone else found a large enough strip of fabric to cover the tear.
As a group we flipped the raft over onto a cooler to produce a flat surface. Someone brilliantly diagnosed “a punctured bottom.”
The operating room was beautiful, if not sterile. Joe, an actual ER doctor, began prepping the patient by sanding the edges of the laceration. Jeff, a carpenter, cut out the drop-stitching that was hanging out of the cut. After the sanding was complete, the wound was cleaned with some solvent. Jerry, a man who makes his living framing paintings and stretching canvases, measured the patch material and cut it out. Then Jeff carefully applied a thin layer of adhesive to the surface of the raft and the patch. After waiting a few minutes, Jeff applied another coat. Then he carefully laid down the patch over the tear. The last step involved vigorous rubbing, with all manner of objects, since nobody had a roller. The rest of us held our breath and held a beer, which seemed like the kind of encouragement the raft needed to heal. The lawyers, of course, waited for a potential malpractice lawsuit.
About an hour after the operation began, it was over. All that was left was to give the dreamboat time to recover from the surgery.
It was a tense time, measured in beers and Frisbee can-jam games. But, in the end, the dreamboat lived. Jeff and his dreamboat would float another 87 miles down the Middle Fork of the Salmon, turn the corner and float 80 more miles of the Main Salmon.
The patch would hold; Jeff’s whisky supply, however, would not.
*** The moral of this mostly true story is that there is no such thing as an unsinkable ship or an unrippable raft, so a well stocked repair kit is important. Also, make sure to check and update your repair kit yearly to ensure that glues and solvents haven’t expired or evaporated. And, most importantly, always bring extra whisky.
Below you will find a list of items that can be found in a Maravia repair kit and a list of items that should be included in any repair kit. Make sure you know how to use your kit.
Repair Kit Contents
- Repair fabric to match your boat 10″ x 15″
- Floor Material 10″ x 15″
- 3” bias tape 8′
- Clifton adhesive 4 oz.
- Valve wrench w/ pusher (A tool to smooth out the patch after applying)
- Hand roller
- Sandpaper
- Cheesecloth to wipe prepped surfaces with cleaning solvent
Not included in Maravia Repair Kit but should be added
- MEK (Methyl Ethyl Ketone solvent/cleaner)
- Scissors
- Knife
- Rubber gloves
- Channel locks or pliers
- Screwdrivers – regular head and Phillips
- Crescent wrench
- Replacement valves
- Maravia multi-valve wrench
- Extra oarlock with keeper pins
- Extra thole pin and clip set
- Duct tape
- Repair instructions from the manufacturer
- Pen and oil pencil
sharing is caring
Facebook
Twitter
Reddit
Pinterest